What is DoH / DoT?
(DNS over HTTPS / DNS over TLS)

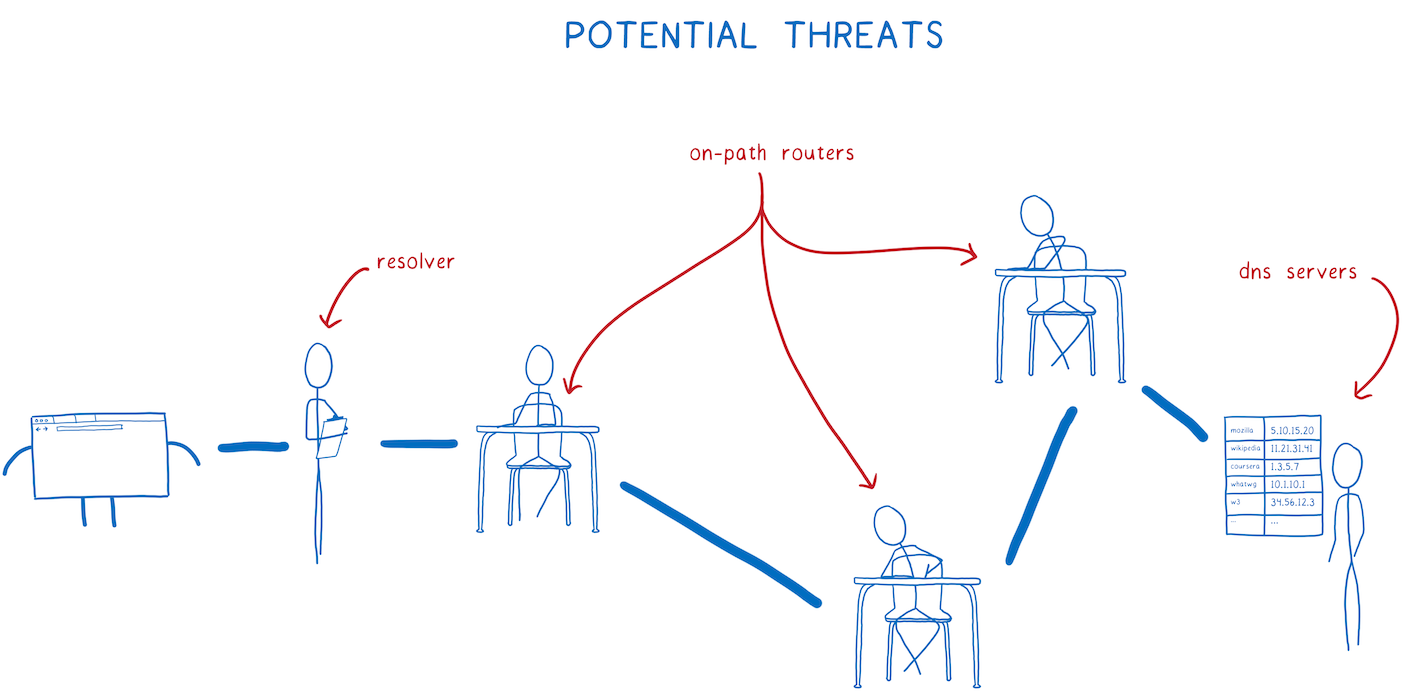
Imagine you’re at a conference. You’re using its public Wi-Fi.
How many entities will know what websites you’ve been visiting out there?
- Conference organizer aka Wi-Fi admin
- Internet service provider (ISP) of the organizer
- All ISPs / companies that route traffic of this ISP
Prior to 2013, most traffic was sent via HTTP without any encryption. So, everyone saw exactly which wikipedia page you’ve been at.
Today, most traffic is encrypted, thanks to HTTPS and Let’s Encrypt. All these entities can still see that you’ve been visiting wikipedia.org — but it’s hard for them to deduce which exact article it was. This happens because your device sends DNS queries, which associate some website with some IP address.
With Encrypted DNS, the middlemen will only see 91.198.174.192 — which is an IP of wikipedia.org. Hold on, there’s a nice detail. Ipinfo.org tells us there are at least 19 domain names associated with this IP! In fact, you could be visiting invoker.com — which has the same IP today. The ISP would not know the difference.
This is particularly useful in our age of cloud computing, when one Amazon IP is reused by five different customers.
Note: Even with encrypted DNS, TLS connections contain unencrypted domain name – it’s called SNI. This can be, however, handled by using TLS 1.3 & encrypted SNI.
HTTPS or TLS?
There are many articles that compare DoH to DoT, but it all comes back to these points:
- It’s harder for middlemen to monitor and censor DNS queries if it’s DNS over HTTPS. It looks like ordinary HTTPS traffic, while DNS over TLS requires separate port 853.
- DNS over TLS may be faster since it’s one level lower, but judging from benchmarks, that’s not the case.
So, my recommendation here is to just use DoH.
PiHole Working with DoH
Now, time to get DoH working with the PiHole we already setup.
We install two more dockers, both are using the tool from CloudFlare called CloudFlared.
Go to your terminal and connect to your Pi.
Then go to your docker folder and make a new folder. I called mine DNS.
Go to that folder and then:
sudo nano docker-compose.yml
Copy/Past and adjust to your needs:
version: "3.5"
services:
  cloudflared-cloudflare:
    image: crazymax/cloudflared:latest
    container_name: cloudflared-cloudflare
    networks:
      macvlan:
        ipv4_address: 192.168.178.8
    ports:
      - "5053:5053/udp"
      - "49312:49312/tcp"
    environment:
      - "TZ=Europe/Amsterdam"
      - "TUNNEL_DNS_UPSTREAM=https://1.1.1.1/dns-query,https://1.0.0.1/dns-query"
    restart: always
  cloudflared-google:
    image: crazymax/cloudflared:latest
    container_name: cloudflared-google
    networks:
      macvlan:
        ipv4_address: 192.168.178.9
    ports:
      - "5053:5053/udp"
      - "49312:49312/tcp"
    environment:
      - "TZ=Europe/Amsterdam"
      - "TUNNEL_DNS_UPSTREAM=https://8.8.8.8/dns-query"
    restart: always
networks:
  macvlan:
    external: true
Close and save it.
sudo docker-compose -p “DNS-DoH” up -d
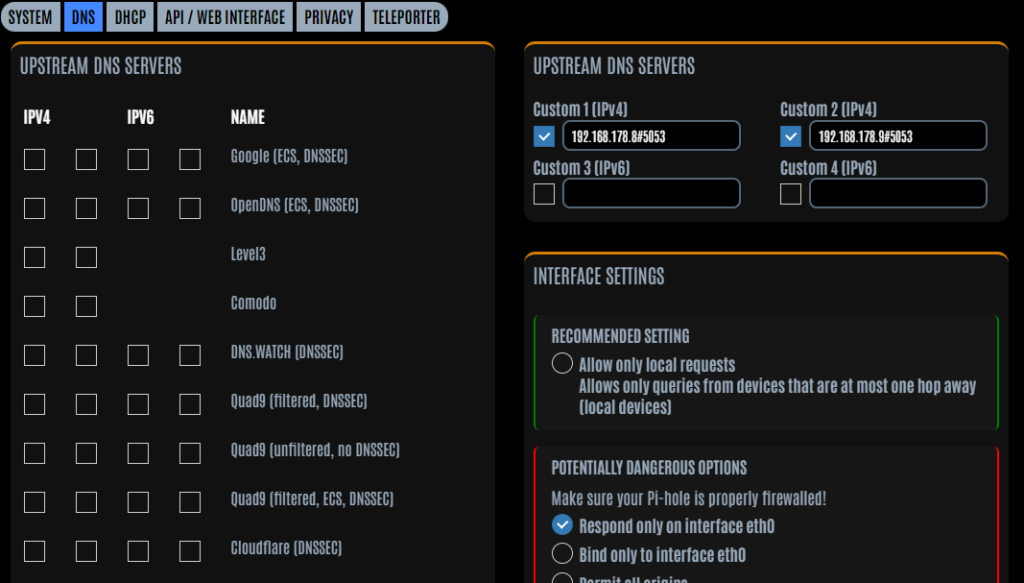
After the containers are up and running go to your PiHole webui.
Go to settings and there select DNS.
Adjust that:

The custom should be ip-address#5053
You should be good to go 😉
